
Native Bacula Verify#
Concept#
Native Bacula Verify is a verification method that combines the Restore Verification workflow provided by Bacularis with Bacula’s native Verify Job mechanism.
Bacularis prepares and restores the backup data, while Bacula performs
the final verification using a Verify Job with the DiskToCatalog level.
How it works#
Native Bacula Verify is configured as part of a Restore Test.
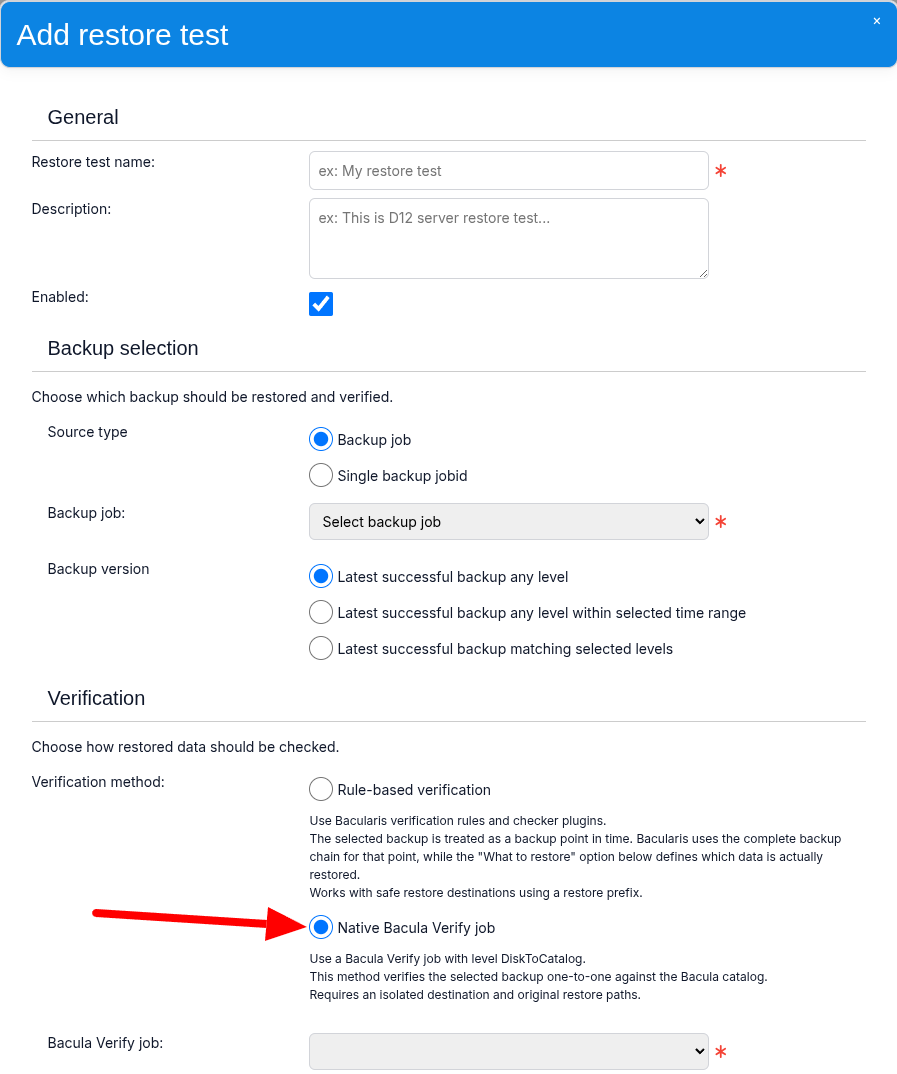
A typical verification workflow starts with Bacularis selecting a single
backup JobId. Bacularis then starts a Restore Job that restores the data
represented by that backup to the configured Restore Destination.
If the Restore Job completes successfully, a Bacula Verify Job with the
DiskToCatalog level is started. The Verify Job compares the attributes
of the restored data with the metadata stored in the Bacula Catalog for
the selected backup JobId.
Important
A Restore Destination used with Native Bacula Verify must support restoring data to its original paths rather than to a prefixed restore directory.
Always use a dedicated and isolated test environment for this purpose. Do not use a production client. Restoring data to its original paths on a production system may overwrite existing production data.

What exactly is tested#
In Restore Verification, Native Bacula Verify compares restored data against
metadata associated with a single selected backup JobId, rather than
reconstructing and validating a complete restore point from a backup chain.
This follows the verification model used by the Bacula Verify Job, where
verification is performed against a specific backup JobId.
For this reason, Restore Verification currently limits Native Bacula Verify to Full backups.
Restore scope#
The complete contents represented by the selected backup JobId are restored.
This allows the Verify Job to compare the restored data with the
corresponding metadata stored in the Bacula Catalog using the DiskToCatalog
verification level.
Unlike Rule-based Verification, Native Bacula Verify does not provide
a selectable restore scope. All data represented by the selected backup
JobId is restored and verified.
Verification criteria#
Verification Rules are not used by this method. Verification Rules are available only with Rule-based Verification.
The verification criteria for Native Bacula Verify are defined in the FileSet used by the backup Job being tested.
For example, if JobId 123 belongs to the backup Job BackupFiles1,
the verification criteria are defined in the FileSet assigned to
BackupFiles1, using the Verify directive in the FileSet
Options block.
Example:
FileSet {
  Name = "BackupFiles1-FileSet"
  Include {
    File = "/home/bill"
    Options {
      Signature = "Sha256"
      Verify = "p2"
    }
  }
}
Usually suitable for Restore Verification:
checksums,
permissions,
selected stable file attributes.
Potentially unreliable in a different restore environment:
inode numbers,
access times,
link counts,
other file-system-specific attributes.
The complete list of verification options supported by the FileSet Verify directive is available in the Bacula documentation:
https://www.bacula.org/15.0.x-manuals/en/main/Configuring_Director.html#13093
Configuration#
Configuring Native Bacula Verify consists of several steps.
1. Prepare a Bacula Verify Job#
Create a Bacula Verify Job dedicated to Restore Verification.
The same Verify Job can be reused by multiple Restore Tests.
2. Configure Verify directives in the FileSet used by the backup Job#
Define which attributes should be checked by the Verify Job using the Verify
directive in the FileSet Options block.
The FileSet used here is the same FileSet assigned to the backup Job whose data will be tested.
3. Prepare an isolated Restore Destination with original-path restore#
Create a Restore Destination configured with Original-path restore in isolated environment.
This means that restored data is written to the same paths it originally occupied when the backup was created, rather than below a prefixed restore path.
Make sure that the Restore Destination uses a dedicated test client rather than a production client. Otherwise, restored files may overwrite existing data.
4. Select Native Bacula Verify in the Restore Test#
Open the Restore Test configuration and, in the Verification section, select Native Bacula Verify as the Verification method.
5. Select the Verify Job#
In the Bacula Verify job field, select the Verify Job prepared for Native Bacula Verify testing.
6. Select the compatible Restore Destination#
Select the Restore Destination prepared earlier with support for restoring data to the original backup paths.
When to use Native Bacula Verify#
Native Bacula Verify is a good choice when:
you want to verify file and directory metadata using Bacula’s native verification mechanism,
only Full backups need to be verified,
you want to use Bacula’s native Verify Job functionality,
you already use Bacula Verify Jobs and want Restore Verification to integrate with that existing configuration,
you need native
DiskToCatalogverification rather than custom checker logic.
Advantages#
Native Bacula Verify provides the following advantages:
uses Bacula’s native Verify Job mechanism,
integrates directly with Bacula FileSet
Verifydirectives,does not require Bacularis checker plugins,
is useful in environments already standardized on Bacula Verify,
produces standard Bacula Verify Job output and status,
allows existing Bacula verification knowledge and configuration to be reused.
Limitations#
Native Bacula Verify has the following limitations:
only the selected backup
JobIdis tested, not a complete backup chain,only Full backups are supported by Restore Verification with this method,
an isolated Restore Destination is required,
data must be restored to its original paths,
some Verify attributes may produce misleading results when data is restored to a different host or file system,
all data represented by the selected backup
JobIdmust be restored,large backups therefore require sufficient storage space in the test environment,
individual paths cannot be selected for testing; the complete selected backup is restored and verified.