Run restore#
To perform a restore, use the Restore wizard available in the main menu.
What is required?#
Any version of the Bacularis web interface
How to do it?#
In the Bacularis web interface, go to the Restore page from the main menu.
Step 1 - Client#
The wizard begins by selecting the Bacula Client whose data you want to restore. From the list of available clients, choose the one that contains the backup you wish to recover.
By default, the Enable restore from copy jobs option is checked. It is recommended to keep this option enabled, even if you’re not restoring a copy job at the moment. It has no effect on standard backup jobs, but for copy jobs, it ensures the correct copies are available for restoration.
Step 2 - Backup#
In this step, you will see a list of backup jobs for the selected client. You can now choose which backup(s) to use for the restore.
There are two backup selection methods:
Selected backup method#
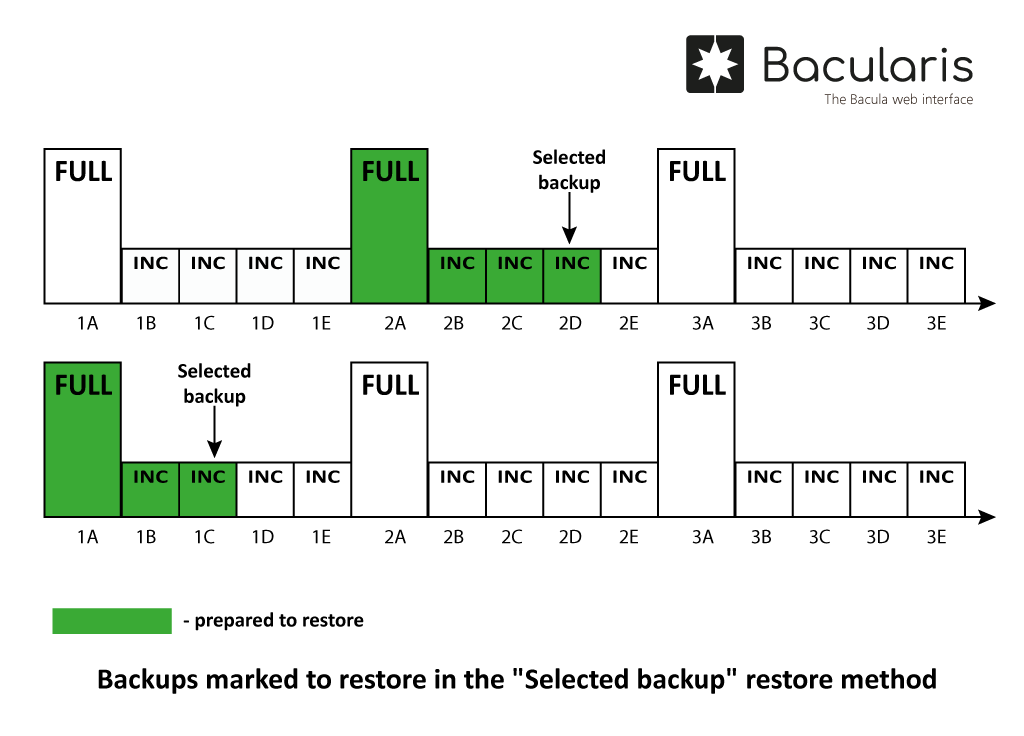
In this method, you choose a specific backup job from the table. This selected backup acts as a “point in time”. Bacularis will automatically include any required previous incremental and differential backups leading up to the last full backup to ensure a consistent restore.
You can also search backups by filename or path using the search fields above the backup list. This is useful if you know the name (or part of it) of the file you want to restore.
Group most recent backups method#

This method automatically selects the most recent set of backups based on Job Name and FileSet. It includes all necessary incremental and differential backups up to the last full backup to ensure data consistency.
To use this method, select the appropriate Job Name and FileSet.
Step 3 - Files#
In this step, you choose the files to restore.
On the left side, you’ll find a file browser showing the contents of the selected backups. By default, it’s in flat view, but you can switch to tree view using the radio buttons above the browser.
To select files, use drag and drop or click the Add link next to each file or folder. Drag the selected files into the white box on the bottom right.
If you click a file in the left pane, a list of its available versions will appear in the top right box. You can then choose a specific version and either drag it into the bottom right box or click Add next to it.
Step 4 - Options#
Restore to Client: Choose the target client where the files will be restored. By default, this is the same client from which the backup was taken.
Restore destination: If Restore to a given directory option is
selected (default), enter the target path on the destination client.
If you want to restore files to their original locations, select
appropriate option for that.
Replace Files: Choose how existing files should be handled during the restore.
Volumes: Displays the required volumes for the restore. This is especially important for magnetic tapes or removable devices, which must be prepared. For file-based storage on fixed disks, no additional action is typically needed.
Step 5 - Run#
Review the restore summary. If everything looks correct, click Run restore to start the process.
Video guide#
You can watch a video tutorial that demonstrates how to perform a Bacula restore using the Bacularis restore wizard.